Back to School 6th Grade Pen and Ruler: Getting the Most from Your SVG Cutting Files
If you have been browsing craft marketplaces or design shops lately, you have likely come across the Back to School 6th Grade Pen and Ruler design and its broader family of school-themed SVG files. These digital downloads promise everything from first-day-of-school shirts to classroom decor, and they are compatible with cutting machines such as Cricut, Silhouette, and Brother ScanNCut. The appeal is clear: one purchase gives you multiple file formats, and you can create custom projects all season long.
But here is the thing that many people discover only after downloading: not all SVG files are created equal, and not every design works perfectly on the first try. Whether you are a small business owner preparing a back-to-school product line, a parent making shirts for your children, or a hobbyist exploring digital crafting, there are several common mistakes that can turn a promising project into a frustrating waste of material and time.
Let us walk through the practical realities of working with Back to School 6th Grade Pen and Ruler and related SVG files so you can avoid the pitfalls and create projects that look as good as you imagined.
Understanding What You Actually Receive
When you purchase a digital pack like the one described, you typically receive a ZIP folder containing an SVG file, an EPS file, a PNG file, a DXF file, and a JPG file. Each format has a specific purpose, and misunderstanding those purposes is where many project problems begin.
The SVG file is the primary format for cutting machines. It contains scalable vector paths that your machine reads to cut your design. The EPS file is similar and works well for professional design software like Adobe Illustrator. The PNG file has a transparent background and is perfect for previewing or printing. The DXF file is compatible with older software versions and some CAD programs. The JPG file is simply a preview image.
One of the most frequent mistakes I see is someone trying to use the JPG or PNG file directly for cutting. These are raster images, not vectors. Your Cricut or Silhouette will not recognize them as cut paths unless you first convert them, and that conversion process often produces jagged edges or messy lines. The correct approach is simple: always use the SVG file for cutting. It preserves the clean, smooth curves that make the Back to School 6th Grade Pen and Ruler design look professional.
Size and Scaling Misconceptions
Another issue that trips up even experienced crafters is assuming the design will automatically fit your project surface. SVG files from digital downloads often open at a default size, sometimes as small as an inch or two wide. If you load that into your software and cut without scaling, you end up with a tiny ruler and pen that look lost on a shirt or tote bag.
Always check the dimensions in your design software before cutting. For a t-shirt, you typically want a design that is 10 to 12 inches wide, depending on the shirt size. For a backpack or notebook cover, you might want something smaller, around 4 to 6 inches. The beauty of vector files is that they scale cleanly, but you need to take that step yourself. I recommend opening the file, selecting all elements, and adjusting the width to your target size while keeping the aspect ratio locked.
There is also a common misunderstanding about resolution. Since SVG files are vector-based, they do not have a fixed resolution. They will remain crisp at any size. But the PNG file included in your download has a fixed resolution, typically 300 DPI. That is fine for printing, but if you scale that PNG up significantly in a raster program, it will become pixelated. Stick with the SVG for cutting and save the PNG for digital previews or low-volume print projects.
Layering and Color Separation Mistakes
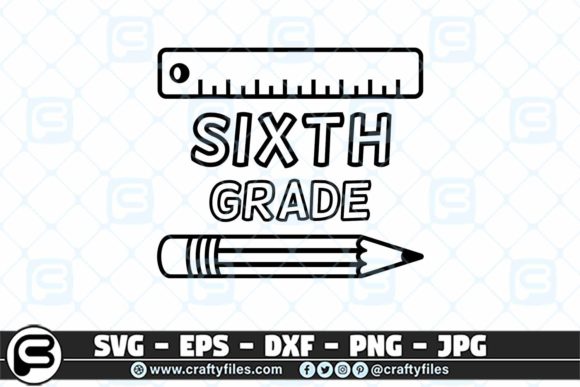
The Back to School 6th Grade Pen and Ruler design likely includes multiple elements: the pen, the ruler, perhaps some text or decorative marks, and possibly a background shape. When you import the SVG into Cricut Design Space or Silhouette Studio, those elements may all arrive on a single layer or as separate layers, depending on how the designer structured the file.
A common mistake is assuming the design is ready to cut in multiple colors right away. Many SVG files are flattened into a single color layer, meaning your machine will attempt to cut everything as one solid piece. If you want the pen to be blue and the ruler to be red, you need to separate those elements manually using the "Ungroup" or "Release Compound Path" function in your software.
Here is a better approach: after importing the SVG, ungroup everything until no further grouping remains. Then look at each individual shape. If the pen is one closed path and the ruler is another, you can assign different colors to each and cut them on separate mats or as a multi-layered project. If the shapes are overlapping or combined in complex ways, you may need to use the "Weld" or "Slice" tools in Cricut Design Space to separate them.
I have seen crafters waste entire sheets of vinyl because they assumed the design was already color-separated, only to discover that everything cut as a single piece. Taking an extra five minutes to examine the layers before cutting saves material, time, and frustration.
Ignoring the Design's Intended Use Case
Not all SVG files are suitable for all projects. A design that looks beautiful on screen may have very thin lines or small details that simply cannot be cut reliably by your machine. The Back to School 6th Grade Pen and Ruler design, for example, may include fine markings on the ruler or small text that reads "6th Grade." If those details are less than about 1/16 of an inch wide, they may tear, lift, or fail to weed properly.
This is a critical consideration for anyone planning to sell finished products. A shirt with a design that has missing details or ragged edges will not meet customer expectations. Before cutting, I recommend reviewing the design in your software at actual size. Zoom in on the thinnest parts and ask yourself whether your cutting machine, with your current blade and material, can handle those details.
If the design is too intricate, you have a few options. You can simplify the design by removing or resizing small details. You can increase the overall size of the design to give those details more physical space. Or you can choose a different file that is specifically designed for the type of project you have in mind. Many designers offer both "detailed" and "basic" versions of their files, so check the listing description carefully.
Checking Compatibility Before You Buy
One of the most overlooked steps is verifying that the file formats included in the download actually work with your specific software and machine. The listing promises SVG, EPS, PNG, DXF, and JPG formats, which covers nearly every modern cutting setup. But there are nuances.
For example, Cricut Design Space handles SVG files natively, but older versions of Silhouette Studio (the free edition) do not always import SVG files correctly. If you use the free edition of Silhouette Studio, you may need the DXF file. If you have the Designer Edition, the SVG file works fine. Similarly, if you use a laser cutter or a heat press printer, you may need different file characteristics altogether.
I always advise checking the software compatibility section of the listing or contacting the seller if you are unsure. A quick test import using the free trial versions of your software can also save you from buying a file that does not work with your setup.
Commercial Use and Licensing Confusion
For small business owners and entrepreneurs, the licensing terms of digital files are a major concern. The product description states that the files are "ready to be used" on cutting machines, but it does not explicitly mention commercial use rights. Many SVG designers allow personal use only, while others offer extended licenses for commercial use at an additional cost.
If you plan to sell items made with the Back to School 6th Grade Pen and Ruler design, you must verify the license terms. Printing a design on a shirt and selling it at a craft fair is commercial use. So is using the file to create products for Etsy or Amazon Handmade. Using the design for your own child's school supplies is personal use.
The mistake I see most often is assuming that because you purchased the file, you can do whatever you want with it. That is not always the case. Look for phrases like "personal use only," "commercial use permitted with credit," or "commercial use license available upon request." When in doubt, message the seller. A clear understanding of licensing protects your business and respects the designer's work.
Weeding and Application Tips
Even after you have successfully cut your design, the weeding and application stages can introduce problems. The Back to School 6th Grade Pen and Ruler design may have small islands of material, like the center of a letter "P" or the inside of the ruler's tick marks. If you rush the weeding process, those small pieces can easily be pulled off accidentally or left behind.
Use a weeding hook or tweezers for precision. Work slowly and start from the largest areas, removing excess material gradually. For intricate designs, a bright light pad or a well-lit window can help you see the cut lines clearly.
When applying your design to fabric or hard surfaces, pay attention to the recommended temperature and pressure for your material. Heat transfer vinyl requires different settings than adhesive vinyl. If the design has multiple colors and layers, you need to align each layer carefully, often using a hinge method or alignment guide. Rushing this step leads to crooked or misaligned final products.
Making the Most of Your Digital Files
The Back to School 6th Grade Pen and Ruler design and similar SVG sets offer tremendous value for crafters, educators, and small business owners. They save hours of design time and provide a polished look that can be hard to achieve from scratch. But the quality of your final project depends heavily on how you prepare, scale, separate, and apply the design.
Before you start your next project, take these steps:
Unzip the folder and store all files in a dedicated folder organized by project or season. Open the SVG in your cutting software and check the layers. Ungroup and inspect each element. Adjust the size to match your intended surface. Check for thin details that might cause cutting failures. Verify your software compatibility and licensing terms. And always do a test cut on scrap material before committing to your final fabric or vinyl.
These small habits separate a frustrating crafting session from a satisfying one. They also ensure that the time and money you invest in digital files translate into products you are proud to wear, give, or sell.
The back-to-school season is a wonderful time to create customized gear that helps kids feel excited and prepared. With a little attention to detail and a practical understanding of how SVG files work, you can turn the Back to School 6th Grade Pen and Ruler design into a finished project that looks exactly as you envisioned. And once you have the process down, you will find yourself using these skills for every holiday, milestone, and celebration throughout the year.