Back to School Line Color: How to Choose and Use Premium Vector Icons Effectively
Starting a new project for the academic season brings plenty of opportunities to refresh your visual identity. Whether you are an educator building a curriculum, a marketer launching a back-to-school campaign, or a startup founder developing an edtech app, the icons you choose shape how your audience perceives your brand. The Back to School Line Color icon set offers a versatile library of 40 meticulously designed icons, but unlocking their full potential requires more than just unzipping a folder. Many users inadvertently select the wrong format or style, leading to inconsistent branding and technical headaches. This guide will help you avoid those common pitfalls and make informed decisions that elevate your work.
Understanding the Foundation: Grids, Vectors, and Versatility
Before diving into specific usage tips, it pays to understand what makes a premium icon set reliable. The Back to School Line Color collection is built on a 64px grid. This might sound like a minor technical detail, but it has a major impact on consistency. When every icon adheres to the same geometric constraints, they align perfectly when placed side by side, creating a harmonious visual rhythm across your interface or print layout.
The inclusion of multiple formats—AI, EPS, SVG, and PNG—is another sign of a thoughtfully prepared set. Relying solely on PNG files may lead to pixelation when scaling. Vector formats like SVG and AI, on the other hand, remain crisp at any size. Taking a moment to understand these fundamentals will save you from redoing work later.
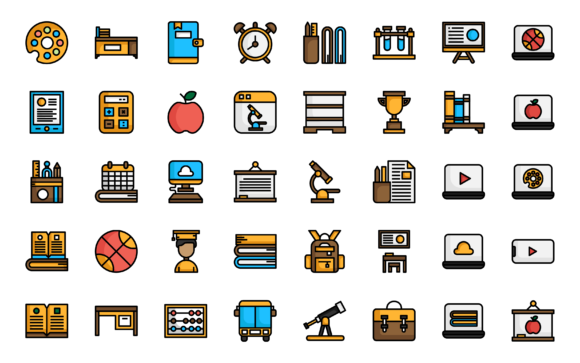
1. Choosing a Style That Clashes with Your Project’s Context
The Back to School Line Color set provides three distinct visual styles: Line, Colorline, and Outline. A frequent oversight is using a single style everywhere without considering its function. Line icons, for instance, excel in user interfaces where clarity and speed are paramount. They communicate actions like “download,” “print,” or “save” without visual noise.
Colorline icons add a layer of depth and personality. They are perfect for presentation slides, infographics, or marketing emails where you want to capture attention. Outline icons sit comfortably in between, offering a lighter, modern feel suitable for subtle accents or mobile navigation.
Practical advice: Map each style to a specific use case. Use Line icons for functional UI elements, Colorline icons for hero graphics or featured sections, and Outline icons for secondary information. This intentional approach prevents visual clutter and strengthens your brand’s communication.
2. Misunderstanding File Formats and Their Ideal Applications
One of the most common technical mistakes is using the wrong file type for the wrong job. The Back to School Line Color package includes AI, EPS, SVG, and PNG files—each serves a distinct purpose.
- SVG is your best friend for web and app development. It remains sharp on retina screens and can be styled with CSS.
- AI and EPS are ideal for editing in Adobe Illustrator. Need to change a color or tweak a stroke weight? Use these vector originals.
- PNG files are convenient for quick placements in slides or documents. The set includes four sizes—64px, 128px, 256px, and 512px—so you can use the appropriate resolution without manually resizing.
Consequence of ignoring this: Using a heavily scaled PNG in a print document often results in a blurry, unprofessional outcome. Conversely, embedding a massive AI file into a web interface unnecessarily slows load times. By selecting the correct format for your deliverable, you maintain both quality and efficiency.
3. Overlooking the Value of an Organized Icon Library
When you are working on multiple projects, keeping track of individual icon files can become chaotic. Many creatives waste time digging through folders to find “that one icon” they used last month. The Back to School Line Color set addresses this by including an Iconjar file.
Using a dedicated icon management tool like Iconjar streamlines your workflow significantly. Instead of opening individual files, you can drag and drop icons directly into your design canvas. This small adjustment cuts down on friction and keeps you in a creative flow state.
Better approach: Before starting a new project, load the entire icon set into Iconjar. Group the icons by style or theme. This upfront organization pays dividends in speed and consistency across your work.
4. Neglecting Color Consistency in Collaborative Projects
The Colorline style comes with a predefined palette. While these colors are carefully chosen, they may not always align perfectly with your existing brand guidelines. A common mistake is using the icons as-is without checking the hex values, leading to a subtle but noticeable color clash in your final design.
Because the set is built using vector files, you can easily customize the colors in Adobe Illustrator (CS6 or later). The package even includes a heavy stroke file, which gives you more flexibility when experimenting with weight and color variations without sacrificing the icon’s structural integrity.
Actionable tip: Spend ten minutes opening the AI file, sampling the icon colors, and comparing them against your brand style guide. If adjustments are needed, use Illustrator’s global color swatches to update all instances at once. This ensures your final product feels cohesive and intentional.
What to Check Before You Start Using the Set
Making a decision based on a quick glance at the preview images is risky. Instead, take a few minutes to verify the following points before committing an icon set to your project:
- Does the icon set cover your core subjects? With 40 icons included, the Back to School Line Color collection covers a broad range of academic themes, from science to art. Identify the specific icons you need immediately.
- Does your design software support the file formats? The set is compatible with Adobe Illustrator CS6 and CC. If you rely on a different vector editor, confirm that it handles AI or EPS imports smoothly.
- Do the three styles match your visual hierarchy? Evaluate how Line, Colorline, and Outline can serve different levels of importance in your layout.
Taking these preparatory steps eliminates unpleasant surprises midway through your design process.
Integrating the Icons into a Real-World Workflow
Let’s walk through a practical scenario. Imagine you are designing a landing page for an online learning platform. You decide to use the Line style for navigation buttons and feature highlights because it keeps the interface clean. For the hero section, you switch to a Colorline icon representing a graduation cap— it adds visual weight and evokes a feeling of achievement. Throughout the page, you use the Outline style for footnotes and supporting visual cues.
For the development handoff, you export the navigation icons as SVG files to maintain sharpness on all devices. You provide the marketing team with the 128px PNG versions for social media snippets and the AI file for the print-ready brochure. By leveraging the specific strengths of each format, you ensure every piece of the project looks its best without extra work.
Final Thoughts on Making the Most of Your Icon Investment
A premium icon set like Back to School Line Color is more than a collection of graphics—it is a toolkit designed to save you time while elevating your visual communication. The difference between a good design and a great one often comes down to execution details: consistent styling, appropriate file formats, and organized asset management.
By understanding the strengths of the Line, Colorline, and Outline styles, choosing the right AI, EPS, SVG, or PNG format for your specific task, and taking advantage of the Iconjar organization feature, you avoid the common mistakes that derail many projects. Whether you are designing for a classroom, a campus event, or a digital learning tool, approaching your icon usage with this strategic mindset will result in clearer, more professional, and more impactful work.